Shoppa Go / Enterprise

Texts

Texts

There are several things you should know about texts before you start making templates in Shoppa.  
Add texts to a template 

  1. Select the New Text Element tool. 
  2. Click and drag to create a text box on the template. 
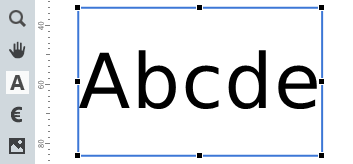
  3. The default text will alway be Abcde 
  4. Click inside the box to edit text 

Single and multi line texts

In Shoppa texts are always within boxes, and there are two types of them – Single and multi line.

Single Line 

In those boxes text size can’t be set – text is always maximized inside the box. 

Multi Line  

Multiple lines can be used and a maximum text size can be set. If the text content doesn’t fit, it is scaled down to fit.  

Upper and lower case

In Text in the menu bar you can set if a text block should be filled with Lower case letters, Upper case letters, always with the First letter uppercase or Mixed case which presents the text as typed. 

aA  Text is unchanged (default). 

Aa  Uppercase first letter, lowercase rest

AA  Uppercase only

aa   Lowercase only

Text placement in a text box

To change the placement of a text within a picture box, use the Alignment buttons in the Arrange Tab for horizontal and vertical alignment. 

Price

Price boxes are used for creating prices and the price formats determine how prices are presented (with for instancecurrency, :-, ;- or many more alternatives after the price) but also to utilize different calculation and rounding functions. See more in the chapter Controlling Bindings. Custom price formats also be requested, please contact us


Add and configure price

  1. Select the New Price Element tool.
  2. Click and drag to create a price box on the template.
  3. Select a Font.
  4. (Optional) Choose a color for the price; Left-click on a color box to fill the price with a color. Right-click on a color box to give it a colored outline.
  5. (Optional) Set the thickness of an eventual outline.
  6. Select a Price Formatting.

Fonts 

In the font list you can select which font you want to use for the selected text box. It is divided into two sections with a horizontal line separating them. 

Above the line are fonts that have been added to the Shoppa account. 
These fonts will be automatically downloaded when starting Shoppa and can be used by all stores.  

Below the line are truetype fonts you have installed locally. 
To make fonts available for the stores, use a font in any template and press save and the font will be downloaded to the store and displayed in the upper part of the list after the next startup.  

You can also import opentype fonts by clicking “Add opentype fonts” at the bottom of the font list and then selecting the font file on your computer.  

Text properties

Line Height

Select or type in the text height to any desired value. Default value is 1

Tracking

Set character spacing. Accepted values are -500 to 500, and default is 0.

Limit Lines

Sometimes there is a need to limit the number of text in a box. Here you can set the limit to a value, or use All which is the default setting. 

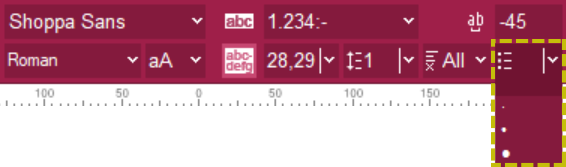
Bullet point list

Shoppa supports bullet point lists. 

  • Shoppa automatically detects if the original text content is a bulleted list, if each line starts with the same character, for example a ‘•’. It will then turn it into a bulleted list with the bullets unchanged. 
  • If text has no bullets, Shoppa treats it as a normal text, unless you select a bullet type. 
  • If you want another bullet type not in the list, you can click in the select box and type any character, for example ‘*’. 

Contact information

Call us:

+46 (0) 171 205 50

Email us:

Support@shoppa.com

Opening Hours:  8:00 – 17:00 (CEST)

Closed weekends and holidays.