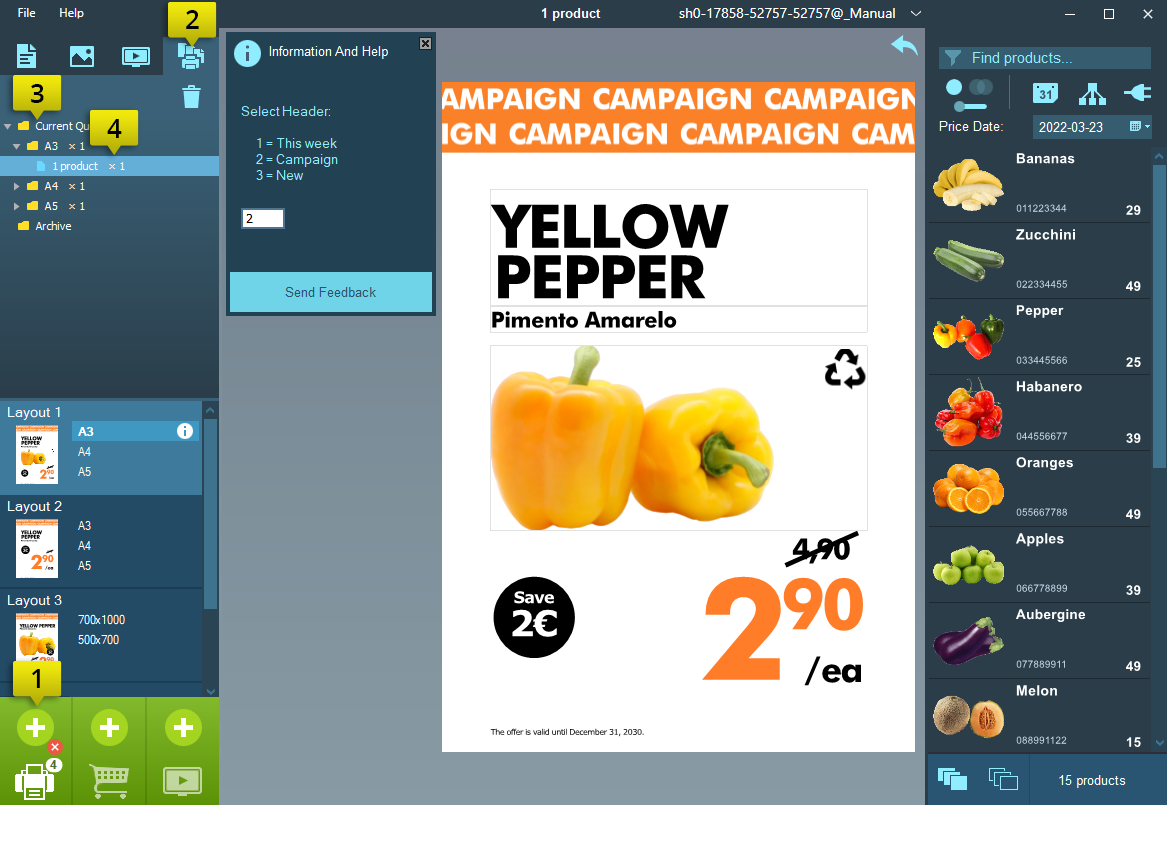
Under the Printer Queue tab, you can review the signs that are queued. The signs are sorted into different folders based on the queued formats. Here you can review and make changes such as changing the format or correcting texts.
Overview Printer Queue
Queue the desired format to the printer queue
Go to the Printer Queue tab
To the left is the Print Queue folder, which also shows folders with signs in the different formats and how many there are in each format
Click on the folders to display the signs to be printed
Edit the queued signs
Increase the number (make copies)
Select the sign in the print queue and click the plus sign
Change format
Select the sign you want to change
Select another format in the format tab. The sign changes to the new format
Remove signs from the queue
Select the sign and then click the minus icon
Select the sign and then click on the delete icon
Right-click on the sign and select Remove from Queue
Archive
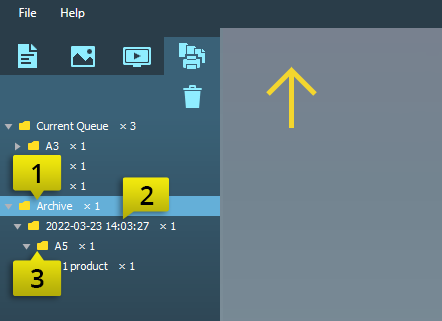
In the printer queue tab, the printer archive is stored. The printer archive holds previously printed signs. From the Archive folder, it is possible to queue a sign again, for example with a new size or format. The print archive holds signs for up to 3 to 5 days based on the amount of data.
The archive folder
Subfolder named with date and time from when the signs were printed
Subfolder with the templates used for the signs. The folders are sorted by format, which means that A5 ends up in one folder, A4 in another folder, and so on.