Adjustmentscan be made in two different ways in Shoppa. A pictureadded to the program can be adjusteditself, and adjustmentscan be added to pictureboxes in the templates.
Adjusting a picture
Whenusingthismethod the picturewill be modified in every template the pictureappears in and the image fileneeds to be added and stored in Shoppa.
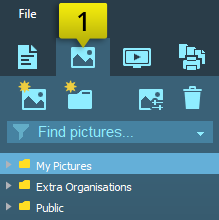
Go to the Picture Tab
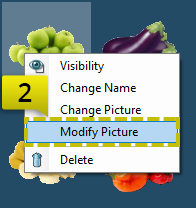
Right-click on the picture (thumbnail or filename) and click Modify Picture.
Adjustment on a picture box
Whenadjusting a picture box, anypictureused in it will be adjusted.
Create a picture box in the template.
Select it.
Click on the button Change Image Adjustments.
Adjustment Settings
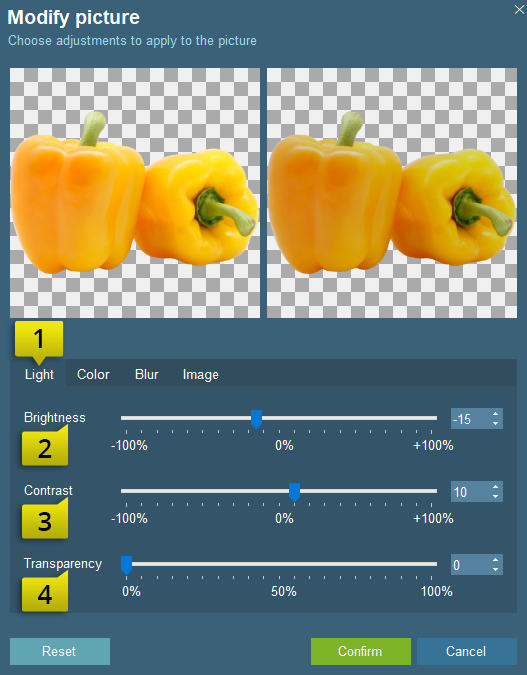
Light
Click on the “Light” button.
Set Brightness.
Set Contrast.
Set Transparency.
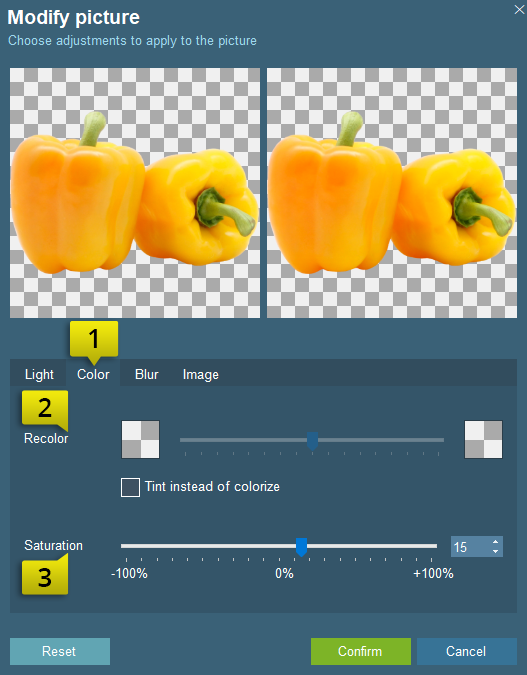
Color
Click on the “Color” button.
Recolor is a function to change the colors in the picture. Click on the squares to the left and right of the slider. Select ‘Tint instead of Colorize’ to get a slightly different effect.
Set Saturation.
Blur
Click on the “Blur” button.Blur is especially useful for backgrounds and animated digital signage.
Set Vertical, Horizontal or Both directions for blur.
Set amount 0-100%.
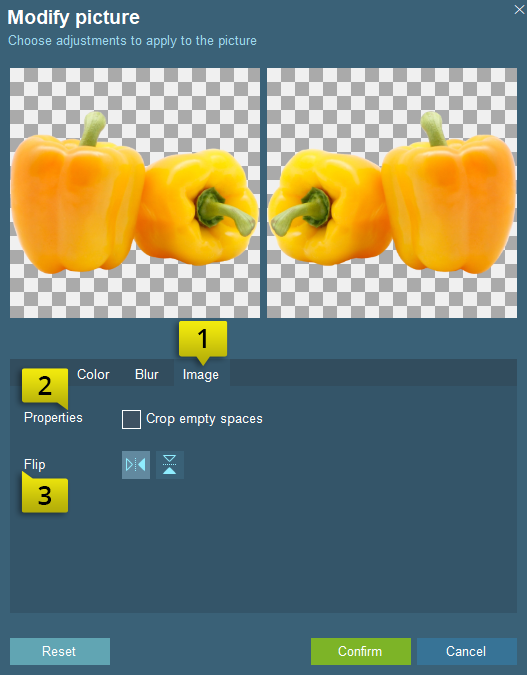
Image
Click on the“Image” button.
Crop Empty Spaces. This feature is automatically turned on when importing images to Shoppa. This is specially useful for product-linked images. White and transparent outer areas are cropped out.